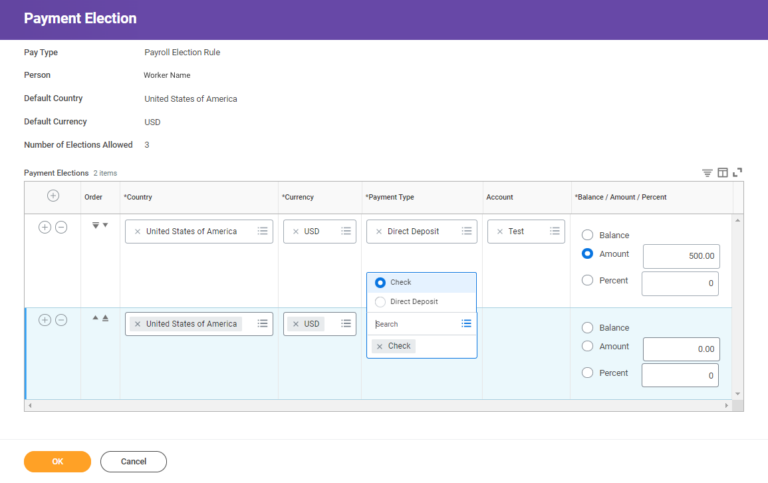
Since everybody loves payday, what do you do if you’ve recently changed banks and need to update your direct deposit information in Workday? What if you need to update your distribution amounts and/or percentages between accounts?
Depending on the security configuration of your employer’s Workday tenant, you may be able to make these updates yourself by changing your payment elections.
Workday Payment Elections are configurable instructions for how (and where) to distribute your paychecks generated within the tenant.
If you are a Workday Payroll Admin, be sure to review the Touchpoints to other modules within your tenant.
New Accounts and Prenotes
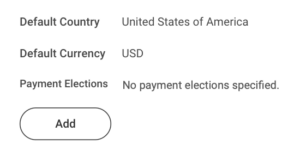
If you are setting up payment elections for the first time, such as during your onboarding, you will first be prompted to add an account.
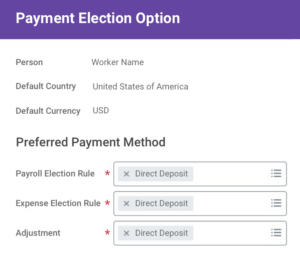
Your employer configured the default Preferred Payment Method for each payment election rule. You will see multiple rows if your employer’s Workday tenant has multiple payment election rules.
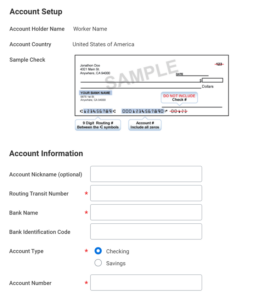
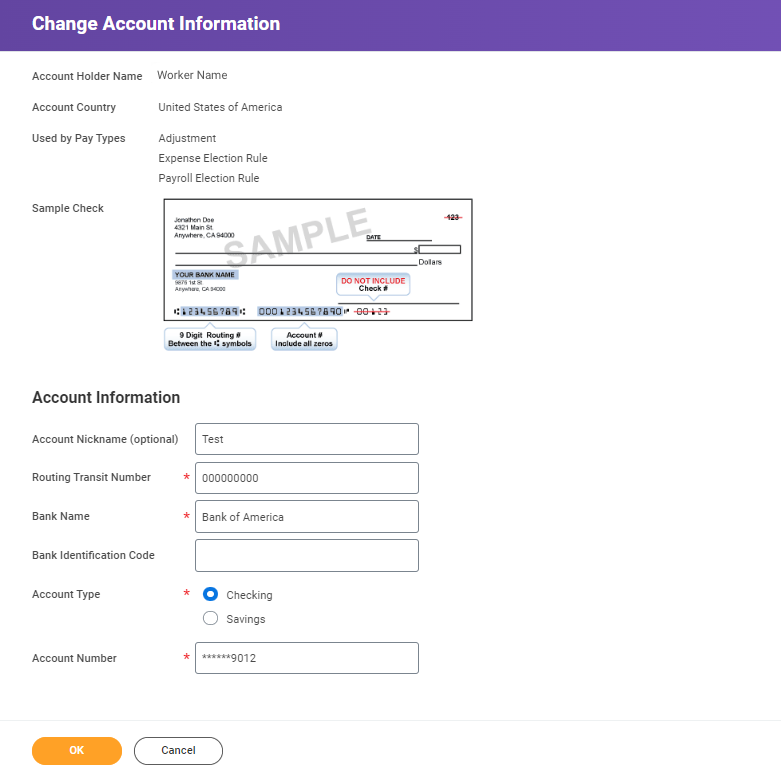
Each country can have its own sample check image, along with different groupings of which fields are required and optional. Your employer also configured these settings.
- Note: Your employer may leverage Workday’s prenote feature when you add new bank accounts for payment elections. Prenotes are attempts to send small amounts (usually less than $1) to a bank account to validate electronic banking information and reduce the number of payment rejections caused by invalid banking information. Depending on the length of the prenote process, you may receive all payments by check until a new account is validated.
Payment Election Options
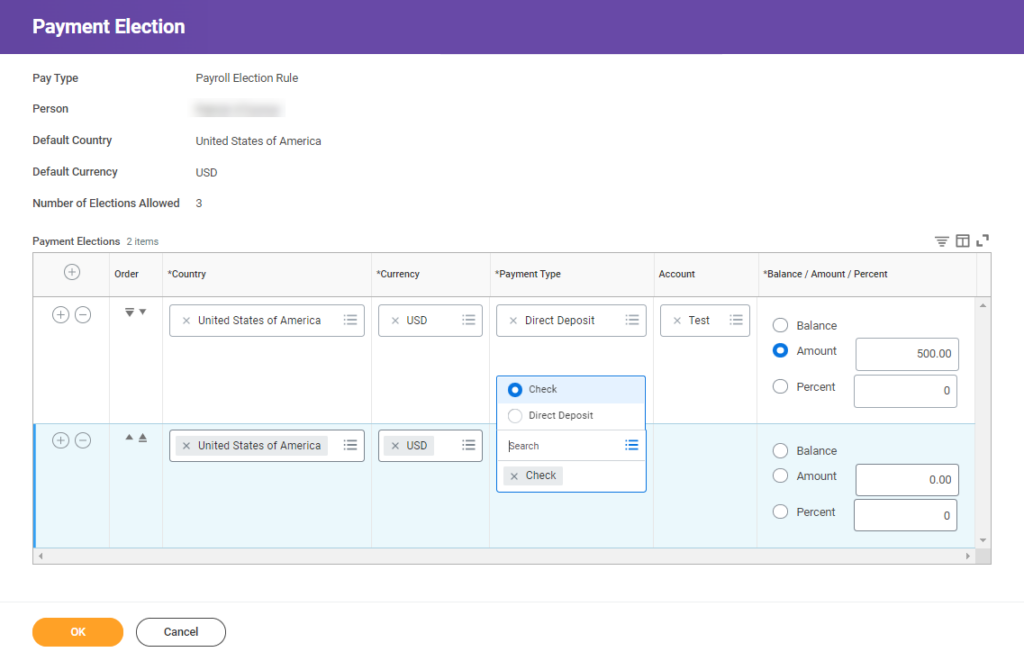
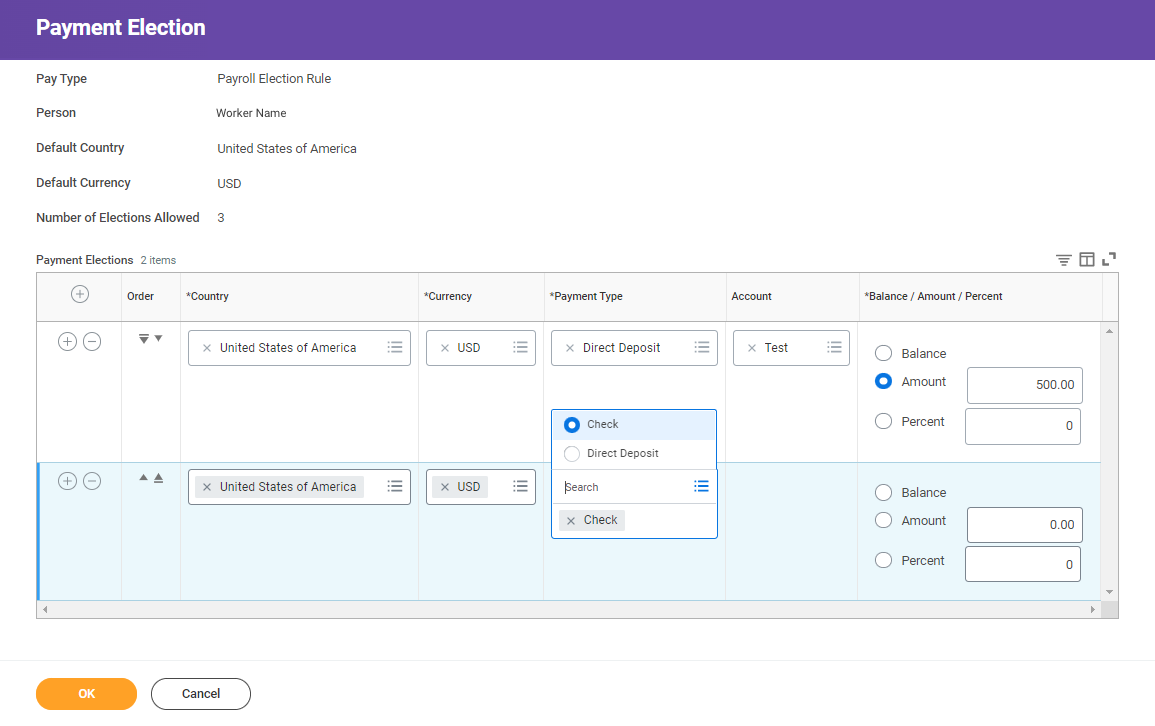
Depending on the payment election rules configured by your employer, you can elect some combination of Amount, Percent, and Balance. To resolve split distributions, Workday uses the same top to bottom order in which you set up your payment elections.
Amount elections route a specific dollar amount to the selected payment method. Select Balance in the bottom row to distribute any remainder.
You cannot select Balance multiple times.
Percent elections distribute a specific percentage of your net pay to the selected payment method. Combined percentages must equal 100 percent, or you must use Balance in the bottom row to distribute any remainder.
Again, you cannot select Balance multiple times.
After setting up an initial payment election, you can add additional bank accounts to split payments further, or you can move a Direct Deposit payment election from 1 bank account to another. For example, you may need to close a bank account that is currently set up for direct deposit and replace it with a new bank account.
- Note: Your employer may have configured the ability for a payroll administrator to add elections on your behalf.
- Note: Your employer may have configured approval of payment elections by a Workday administrator and/or require an attachment that references the new bank account’s details. Adding an account (alone) will not trigger the approval process. Adding or removing payment elections will.
Editing Existing Accounts and Elections
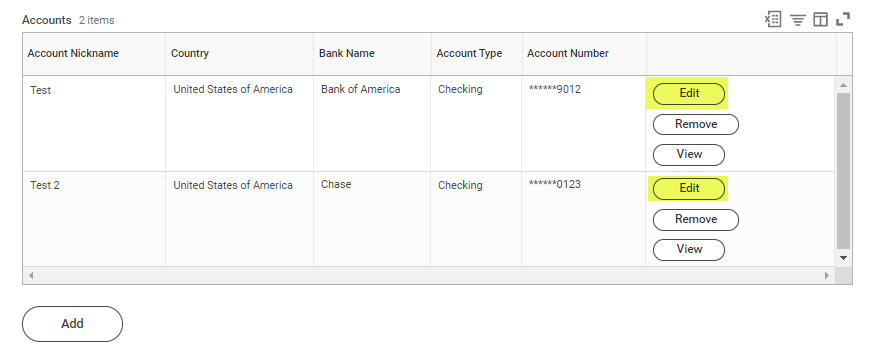
In the Accounts grid, you can change an existing bank account’s details (i.e. Name, Account Nickname, Account Number, or Routing Number). When you change a bank account’s details, Workday automatically updates all payment elections using that account’s details.
- Note: Your employer may have configured the ability for a payroll administrator to edit existing accounts and elections on your behalf.
- Note: Your employer’s Workday administrators may have also configured override names to these fields. As previously mentioned, they are also able to determine which bank account attributes are required or optional, and you may see a variety of different fields by country, if your employer uses the payment elections feature for multiple countries.
In the Payment Elections grid, you can change payment elections from one payment type to another. If the payment election rules allow more than 1 election for a pay type, you can add rows to specify how to distribute the payments.
- Note: Your employer may have configured approval of payment elections by a Workday administrator and/or require an attachment that references the new bank account’s details. As previously mentioned, editing an account (alone) will not trigger the approval process. Adding, editing, or removing payment elections will.
Removing Existing Accounts
You can remove a bank account if it is not in use by a payment election.
- Note: Your employer may have configured the ability for a payroll administrator to remove payment elections on your behalf.
- Note: Your employer may have configured an automatic deactivation of all payment elections, in the event of termination of employment.
Viewing Existing Accounts
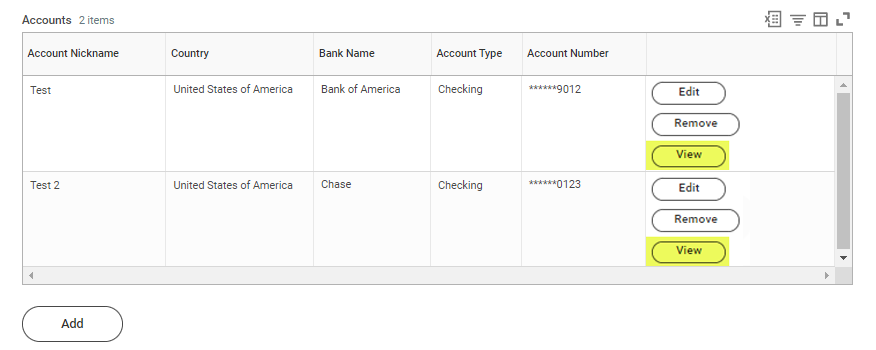
You can review any bank account’s information by clicking View.
- Note: Your employer may have configured the ability for a payroll administrator to view bank account information on your behalf. Account numbers are masked by default.
- Note: Your employer may have also configured an automatic deactivation of all payment elections, in the event of termination of employment.
Workday Touchpoints
This section pertains to Workday administrators, rather than end-users.
Payment Elections have touchpoints between the Expenses, HCM, Payroll, and Student Financials modules.
Expenses
- Payment elections also determine the options a person can select when receiving their expenses.
HCM
- To gather bank information from new users, you can add Manage Payment Elections as an action step to the Onboarding business process.
- To allow the setup of payment preferences in the event of relocation, you can add the Add Payment Elections step to the Start International Assignment business process.
Payroll
- Payment elections determine the options a person can select when receiving their payments.
Student Financials
- Payment elections determine the options students can select regarding receiving refunds and making payments.

