What is a Workday EIB?
A Workday Enterprise Interface Builder, or as we all call it – an EIB, is an integration tool used to transfer Workday data in bulk. It supports both inbound and outbound integrations.
In this blog, we are going to focus on the applications of Inbound EIBs.
Before jumping in, be sure to bookmark the database of Inbound EIB Examples on Workday Community!
When Should I Use an EIB?
Unfortunately, there isn’t a magic formula to determine when to use an Inbound EIB over manual data entry. Several factors come into play, such as the volume of data. And while that is certainly a key consideration, it’s not the only one.
- The type of EIB plays a significant role, as each EIB type will come with its own unique template to populate. (e.g., loading Job Requisitions in Recruiting, Organization Changes in HCM, Pay Inputs in Payroll, etc.)
- Different EIBs have varying levels of complexity and time requirements for populating the necessary fields.
Additionally, your familiarity with a particular EIB template can impact the decision. The validation and error resolution process for loading an EIB can be time-consuming, especially if you’re less experienced with it. In such cases, manual entry might be more efficient. Ultimately, deciding whether to use an EIB or manual input requires careful evaluation of these factors.
How do I Create an EIB?
To create an EIB, simply search for the task Create EIB (keep in mind you will need the appropriate security to have access to the task). First, determine an identifiable name for your EIB and whether it will be an inbound or outbound EIB. Typically, we recommend aligning as an organization to come up with a consistent naming convention.
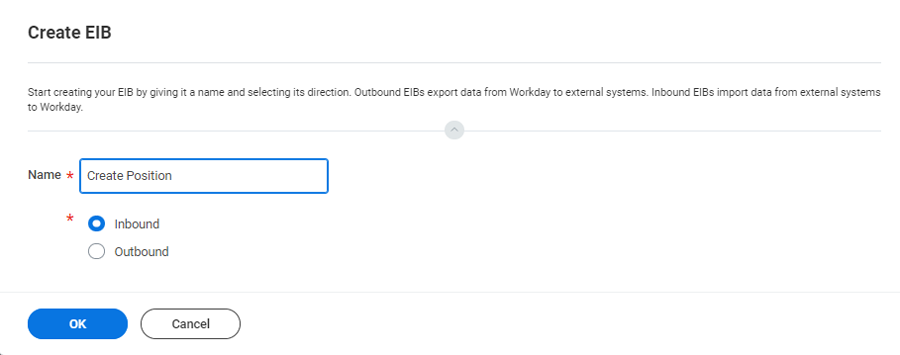
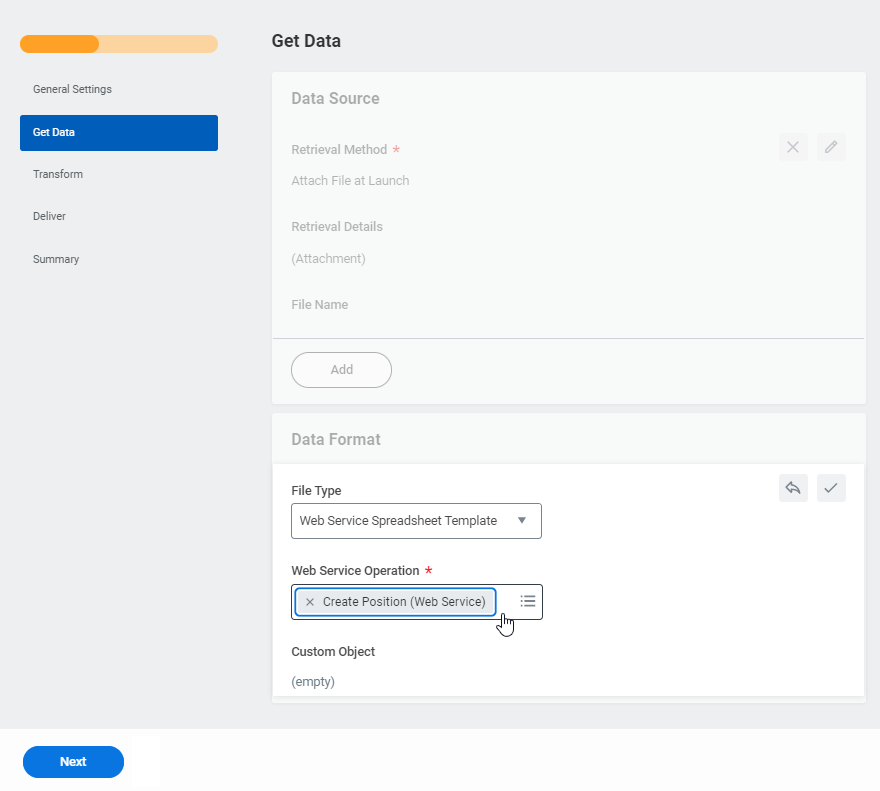
Once in the Create Inbound EIB task, navigate to the Get Data tab, and find the field labeled Web Service Operation. In the field box, search for your desired EIB. After selecting your appropriate Workday Web Service, you can click through the remaining settings. For more information on the different types of Inbound EIBs, check out the community link at the bottom of this page.
After your EIB is created, you will need to generate the spreadsheet template to populate the data. To do so, select the related actions on the View Integration System page and find the Template Model Tab > Generate Spreadsheet Template. Run the background process until completion, and the template can be pulled either from the output file or your notifications inbox.
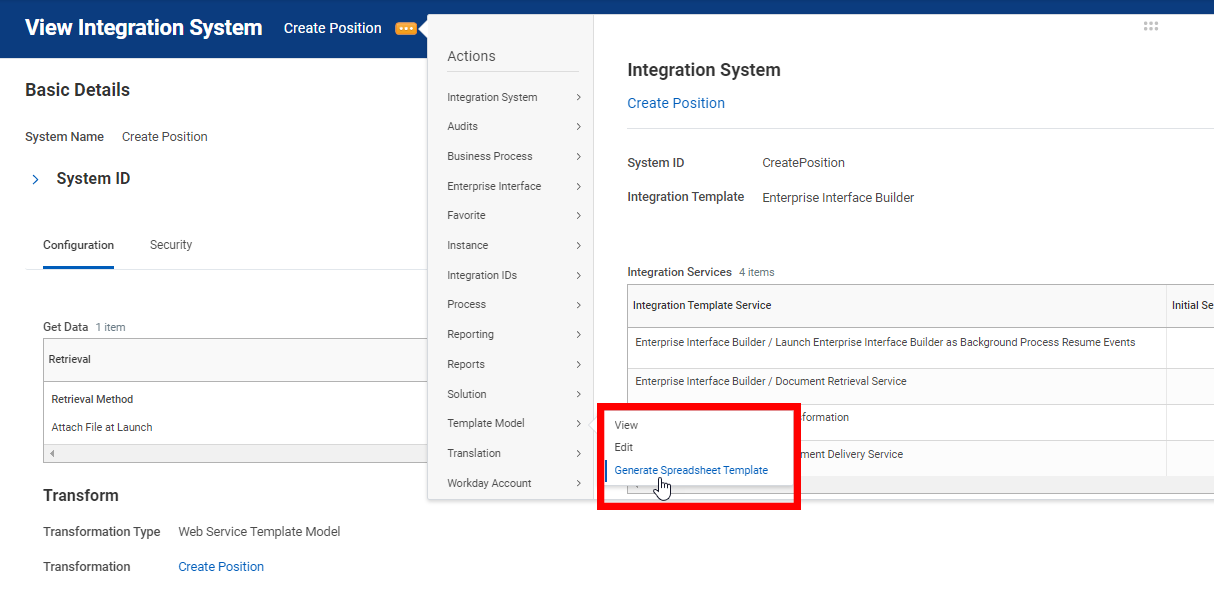
- NOTE: To find your Integration System page for your EIB in the future, you can search with the prefix ‘Intsys:’ and the name of your EIB.
Populating and Loading Your EIB
Populating an EIB can greatly vary between templates. There are, however, a few consistencies across the board to note.
If the EIB is associated with a business process, the first tab on your EIB XML file will be labeled Overview. This tab instructs the EIB on how to handle certain steps and subprocesses within that business process.
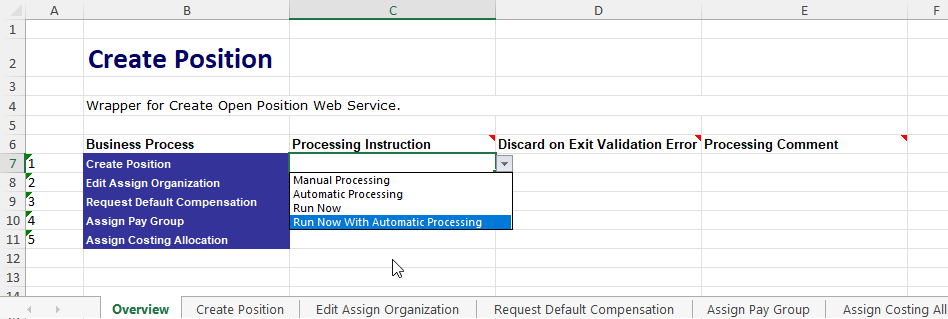
Each EIB template can vary from one tab with minimal fields that are required to populate to over a dozen tabs with many fields to populate. For a non-overview tab, it is important to pay attention to the fields that are marked Required vs Optional.
Not filling out a required field will likely automatically generate an error when loading. Additionally, what is consistent throughout each EIB is a need for the spreadsheet key column. This will mark a unique instance of data each time a new number is listed.

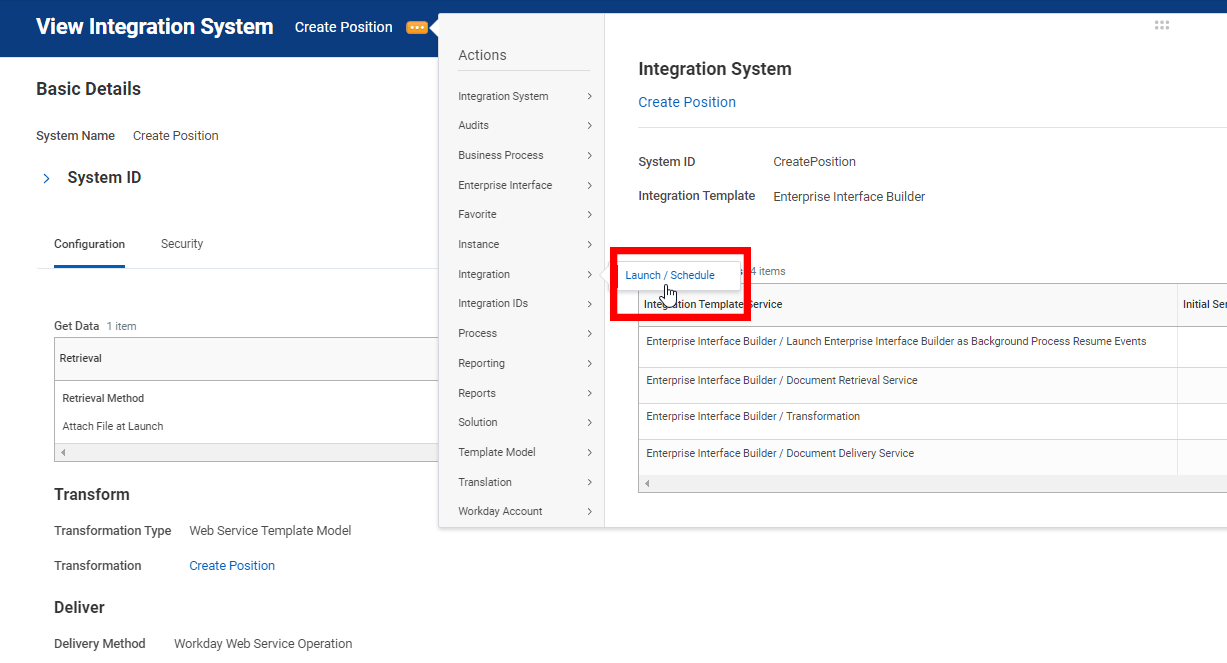
Once your template is populated, it is time to validate and load in Workday. We always recommend first validating and loading into a test environment and then validating again in Production before officially loading the xml file in. To validate an EIB, return to the integration system page, and from the related actions, select the tab Integration > Launch / Schedule.
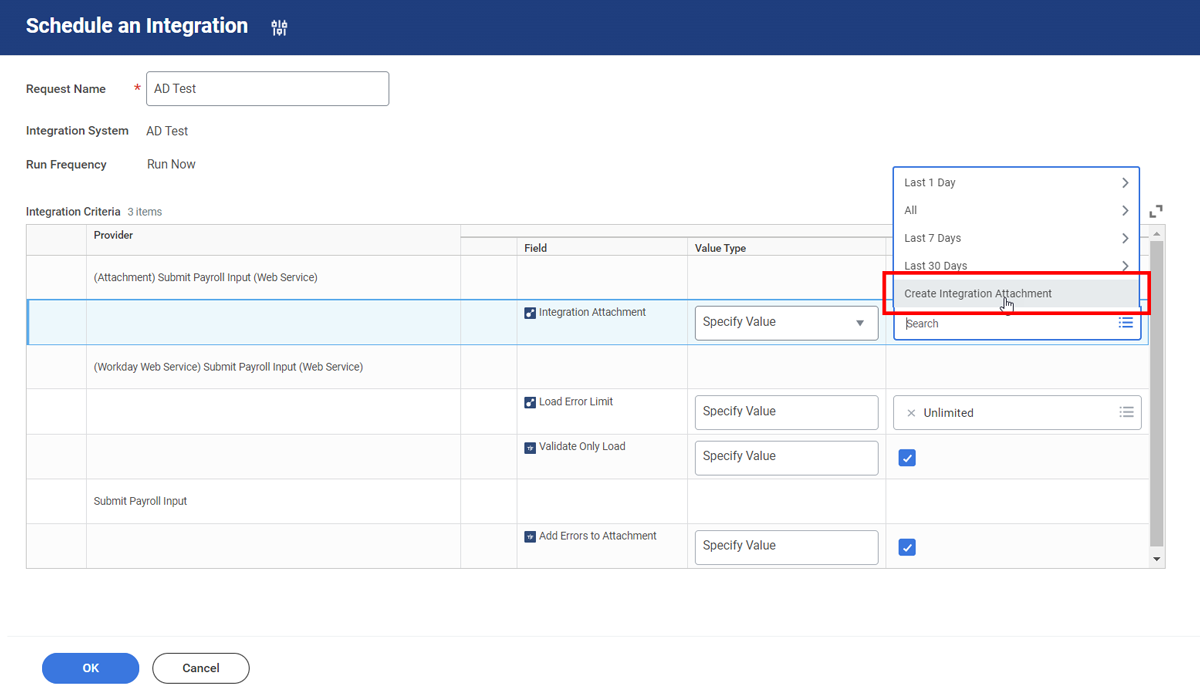
For the initial Launch prompt, you should be able to click “OK” to be taken to the Schedule an Integration page. Once on the Schedule page, use the Create Integration Attachment option to upload your EIB spreadsheet xml file into Workday. To validate the file, you will also need to check the Validate File Only box, and we recommend checking the Add Errors to Attachment box as well.
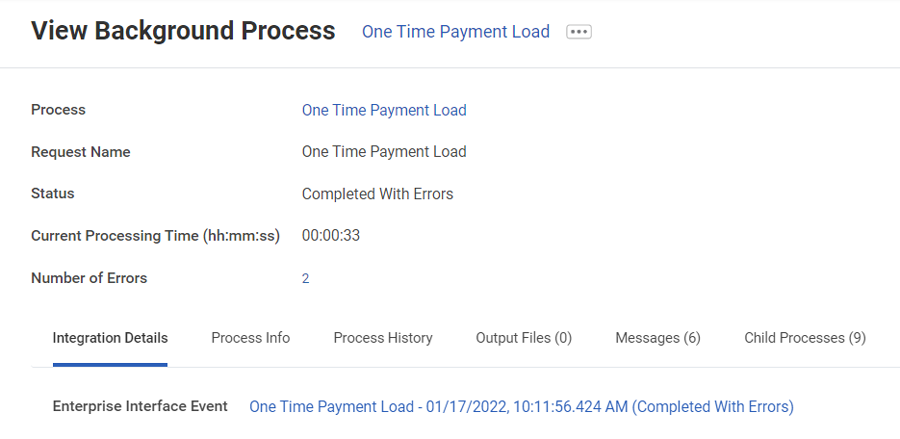
Next, on the View Background Process page, click the refresh button until the file fully loads. If there are issues with the file, you will see a status of ‘Completed With Errors’ in the status field. If your file was successfully validated, you will see a status of ‘Completed’.
To review the error report for the load, scroll down to the executive summary section and open the Attachment with Failure Details to review.

You will need to review the error details and make adjustments to the EIB spreadsheet template. You should repeat the process of validating until you are able to load the file with no errors. Error handling and interpreting the error report can be challenging and vary from EIB to EIB.
- Once the file is validated, repeat the loading process one last time with the same Schedule settings, except you will want to leave the “Validate Only” box unchecked.
- During this final load, you should receive a status of ‘Complete’ and ‘All Records Loaded Successfully!!’ in the Execution Summary section.
Even seasoned Workday users can find EIBs challenging. Remember, there’s a wealth of support available—both within the Workday Community and here at Commit. If you need help with any aspect of EIBs, don’t hesitate to reach out. We’re here to assist!
For further assistance on this and common errors for each EIB, visit this link to Workday Community.


